Cross Project Workflow
Best Practice
Cross Project workflows in ShotGrid allow you to re-use, share and work with Assets across multiple Projects. The most common method for re-using Assets is to use a single “Asset Library” project as the source Project. While we still recommend using a singular “Library” project to keep it simple, ShotGrid also allows you to link Assets across any active Project.
There are two main ways to re-use Assets. The more nimble approach is to re-use a source asset “as is” (Direct Reference). However, limitations or restrictions may be in place based on Projects and Pipelines—so copying the source Asset over into a project is also an option (Duplicating or Forking).
- Direct Reference - Re-use a source Asset as is. If that asset changes, you can keep your Version or update to the latest Version.
- Duplicating or Forking - Import the source Asset from another Project (breaking any connections to the source) to build on it or take control and save to your current Project.
Cross Project / Library Project Workflow
This tutorial will show you how to use ShotGrid Toolkit to re-use your Assets across multiple Projects and build up an Asset library that’s easily accessible for Artists in your studio. Let’s take you through the three main steps to get this up and running.
- ShotGrid Assets linked across Projects - use the Linked Projects field to link between Assets and Projects
- Loading/referencing Assets into Scenes - use a dynamic tab in the Loader
- Keep Assets up to date - use the Scene Breakdown App
Step 1 - Linking Assets
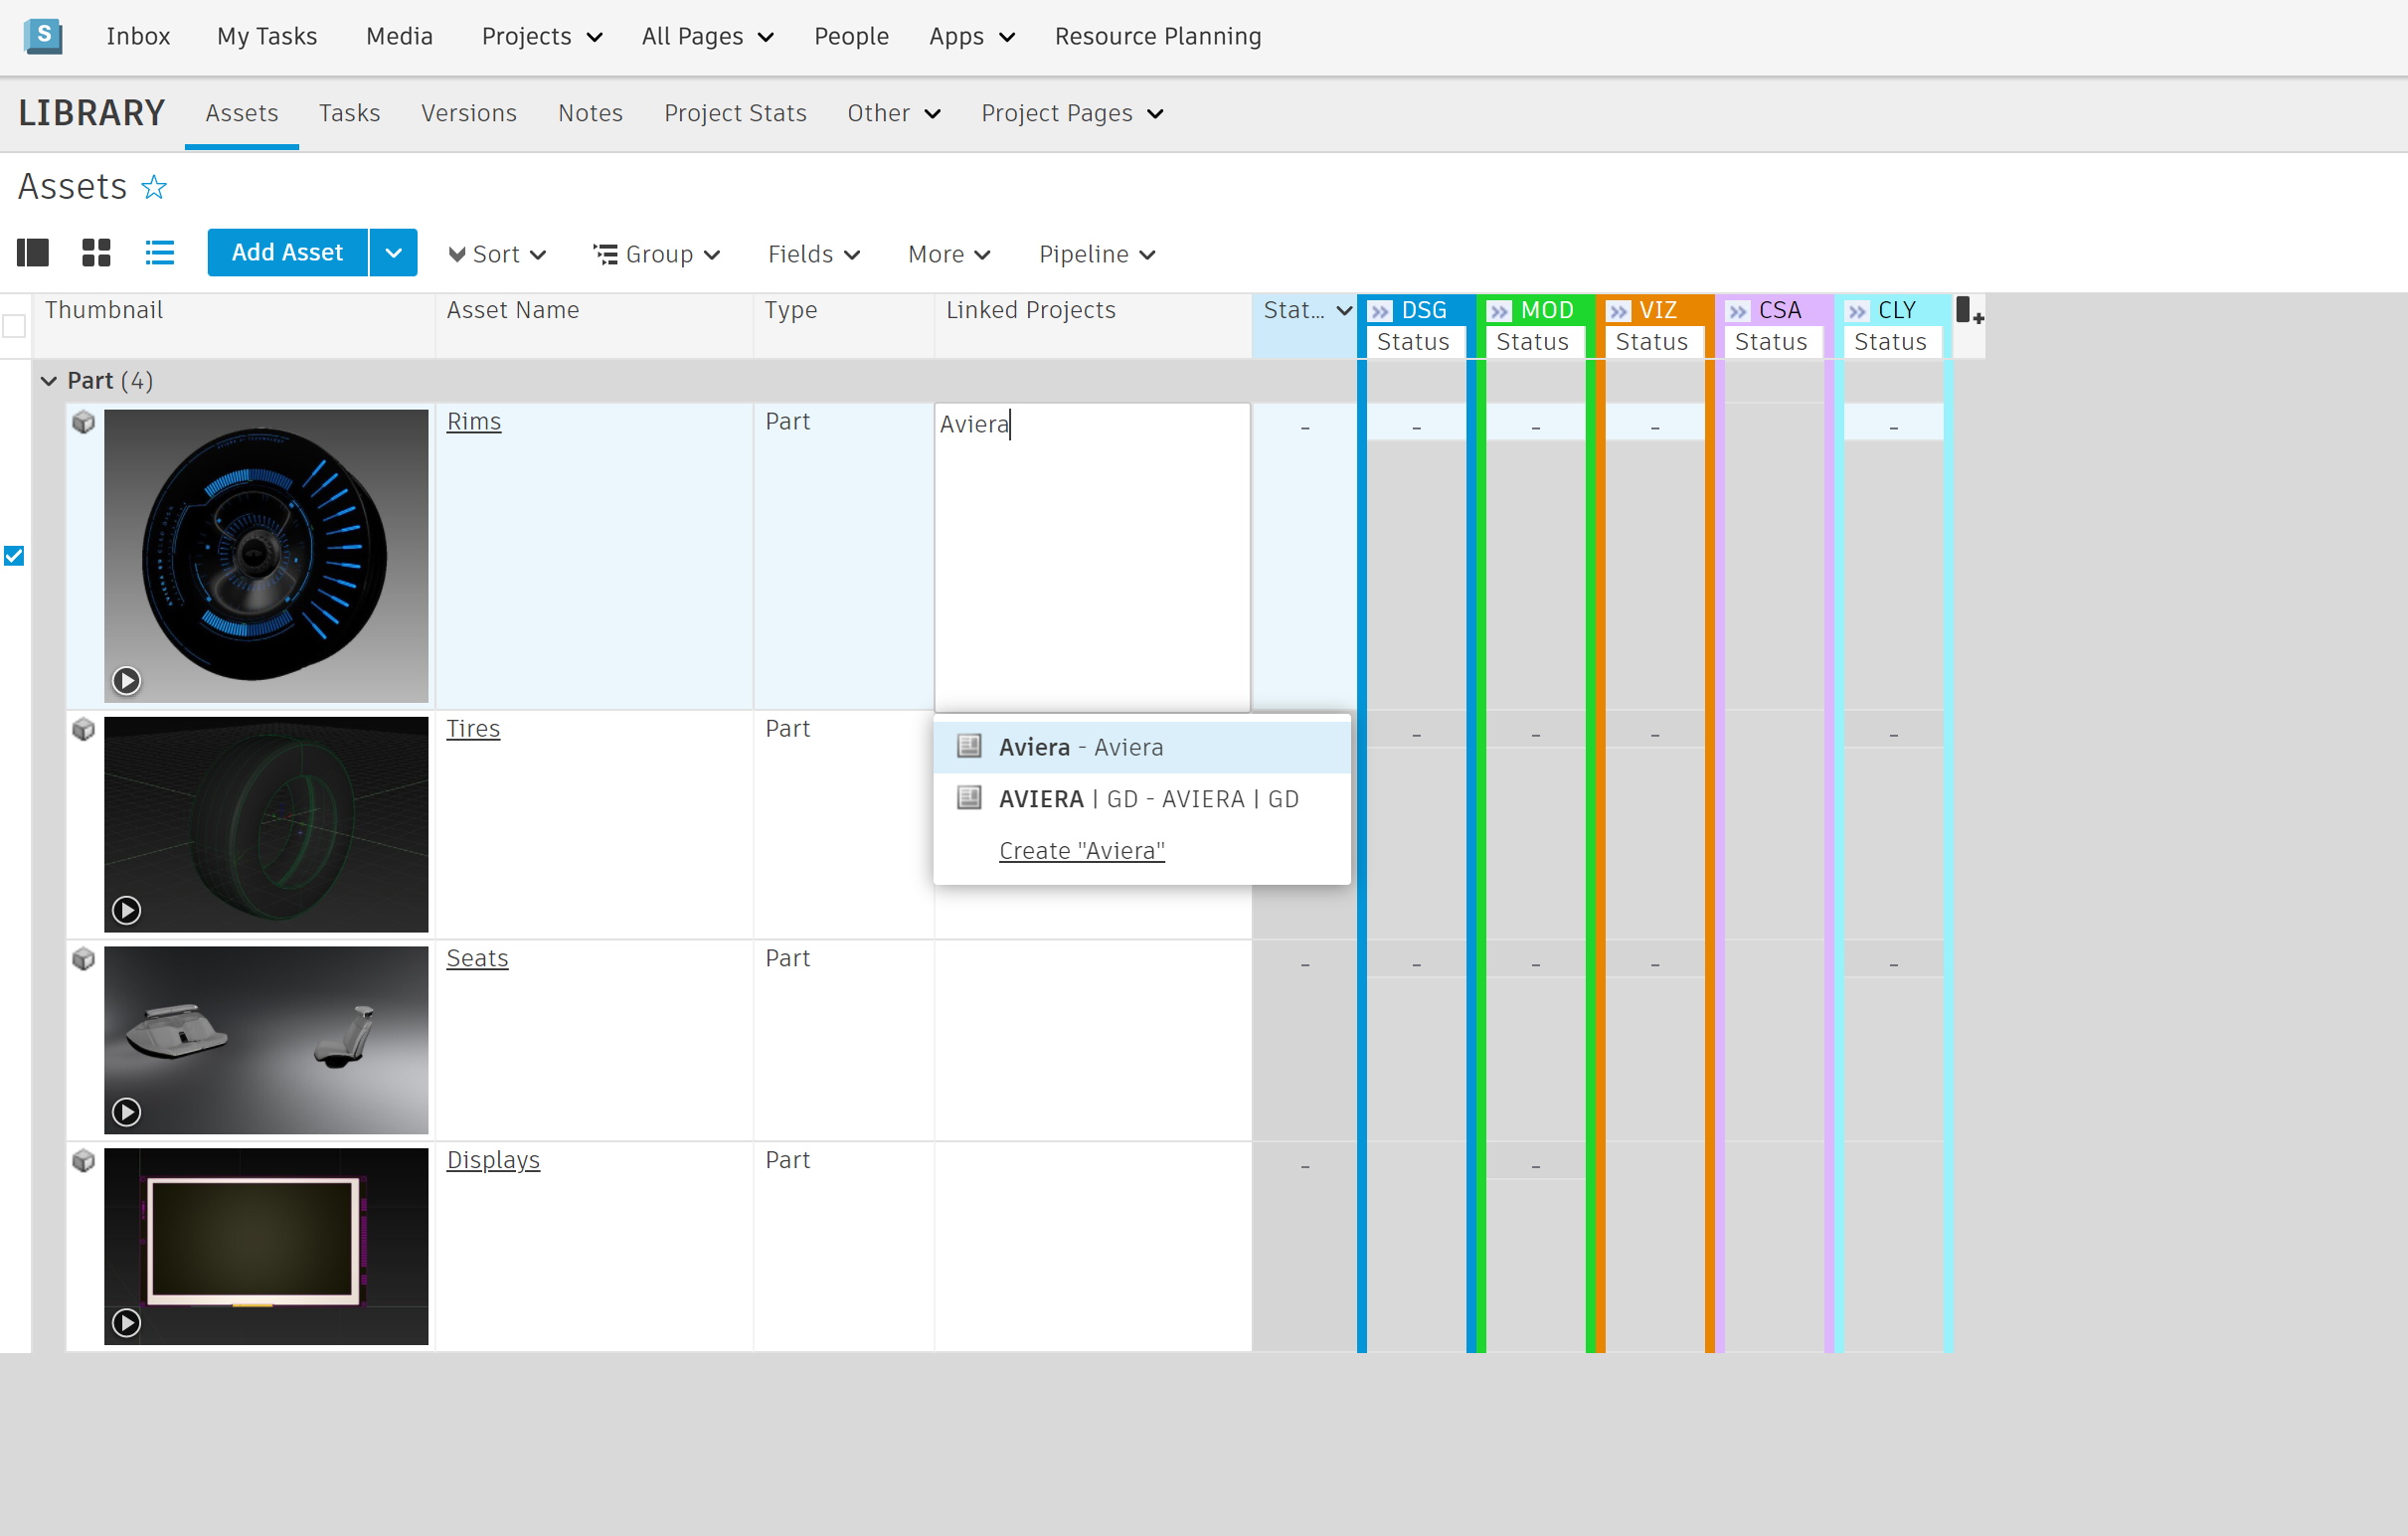
The first step to re-use an Asset is by making ShotGrid aware of what other Projects you would like to use the source Asset in.
From the source Project that has the original Asset you’re re-using, navigate to the Assets page. Add the Linked Projects field to the Assets Page (if it’s not already visible). Then, specify Project you want to re-use the Asset in.
See the detailed documentation here.
Step 2 - Loading Assets
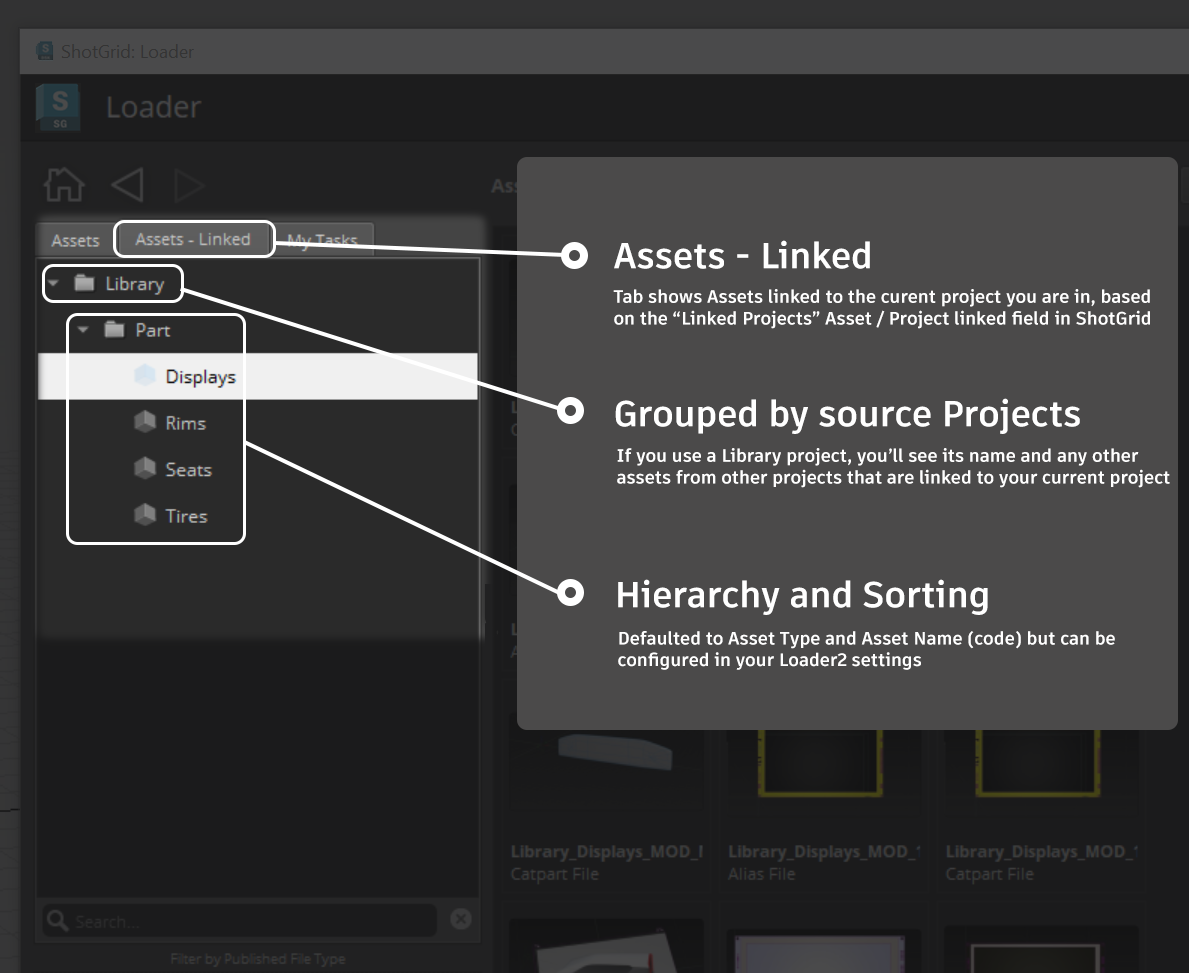
With an Asset properly linked via the Linked Projects field, you can have a simple and dynamic tab in Loader to show your studios linked, re-used Assets. This helps Artist and creative teams easily re-use Assets across multiple Projects.
Once the Asset is properly linked:
- Launch your content creation software of choice (Maya, Houdini, Alias, etc.)
- Set the context by opening or saving your working scene
- Once your scene context is set, launch the Loader from the ShotGrid menu
- Now, you will see the tab Assets - Linked which allows you to access Published Files for Assets across Projects.
See the detailed instructions to add to this Tab to the Loader in your config here.

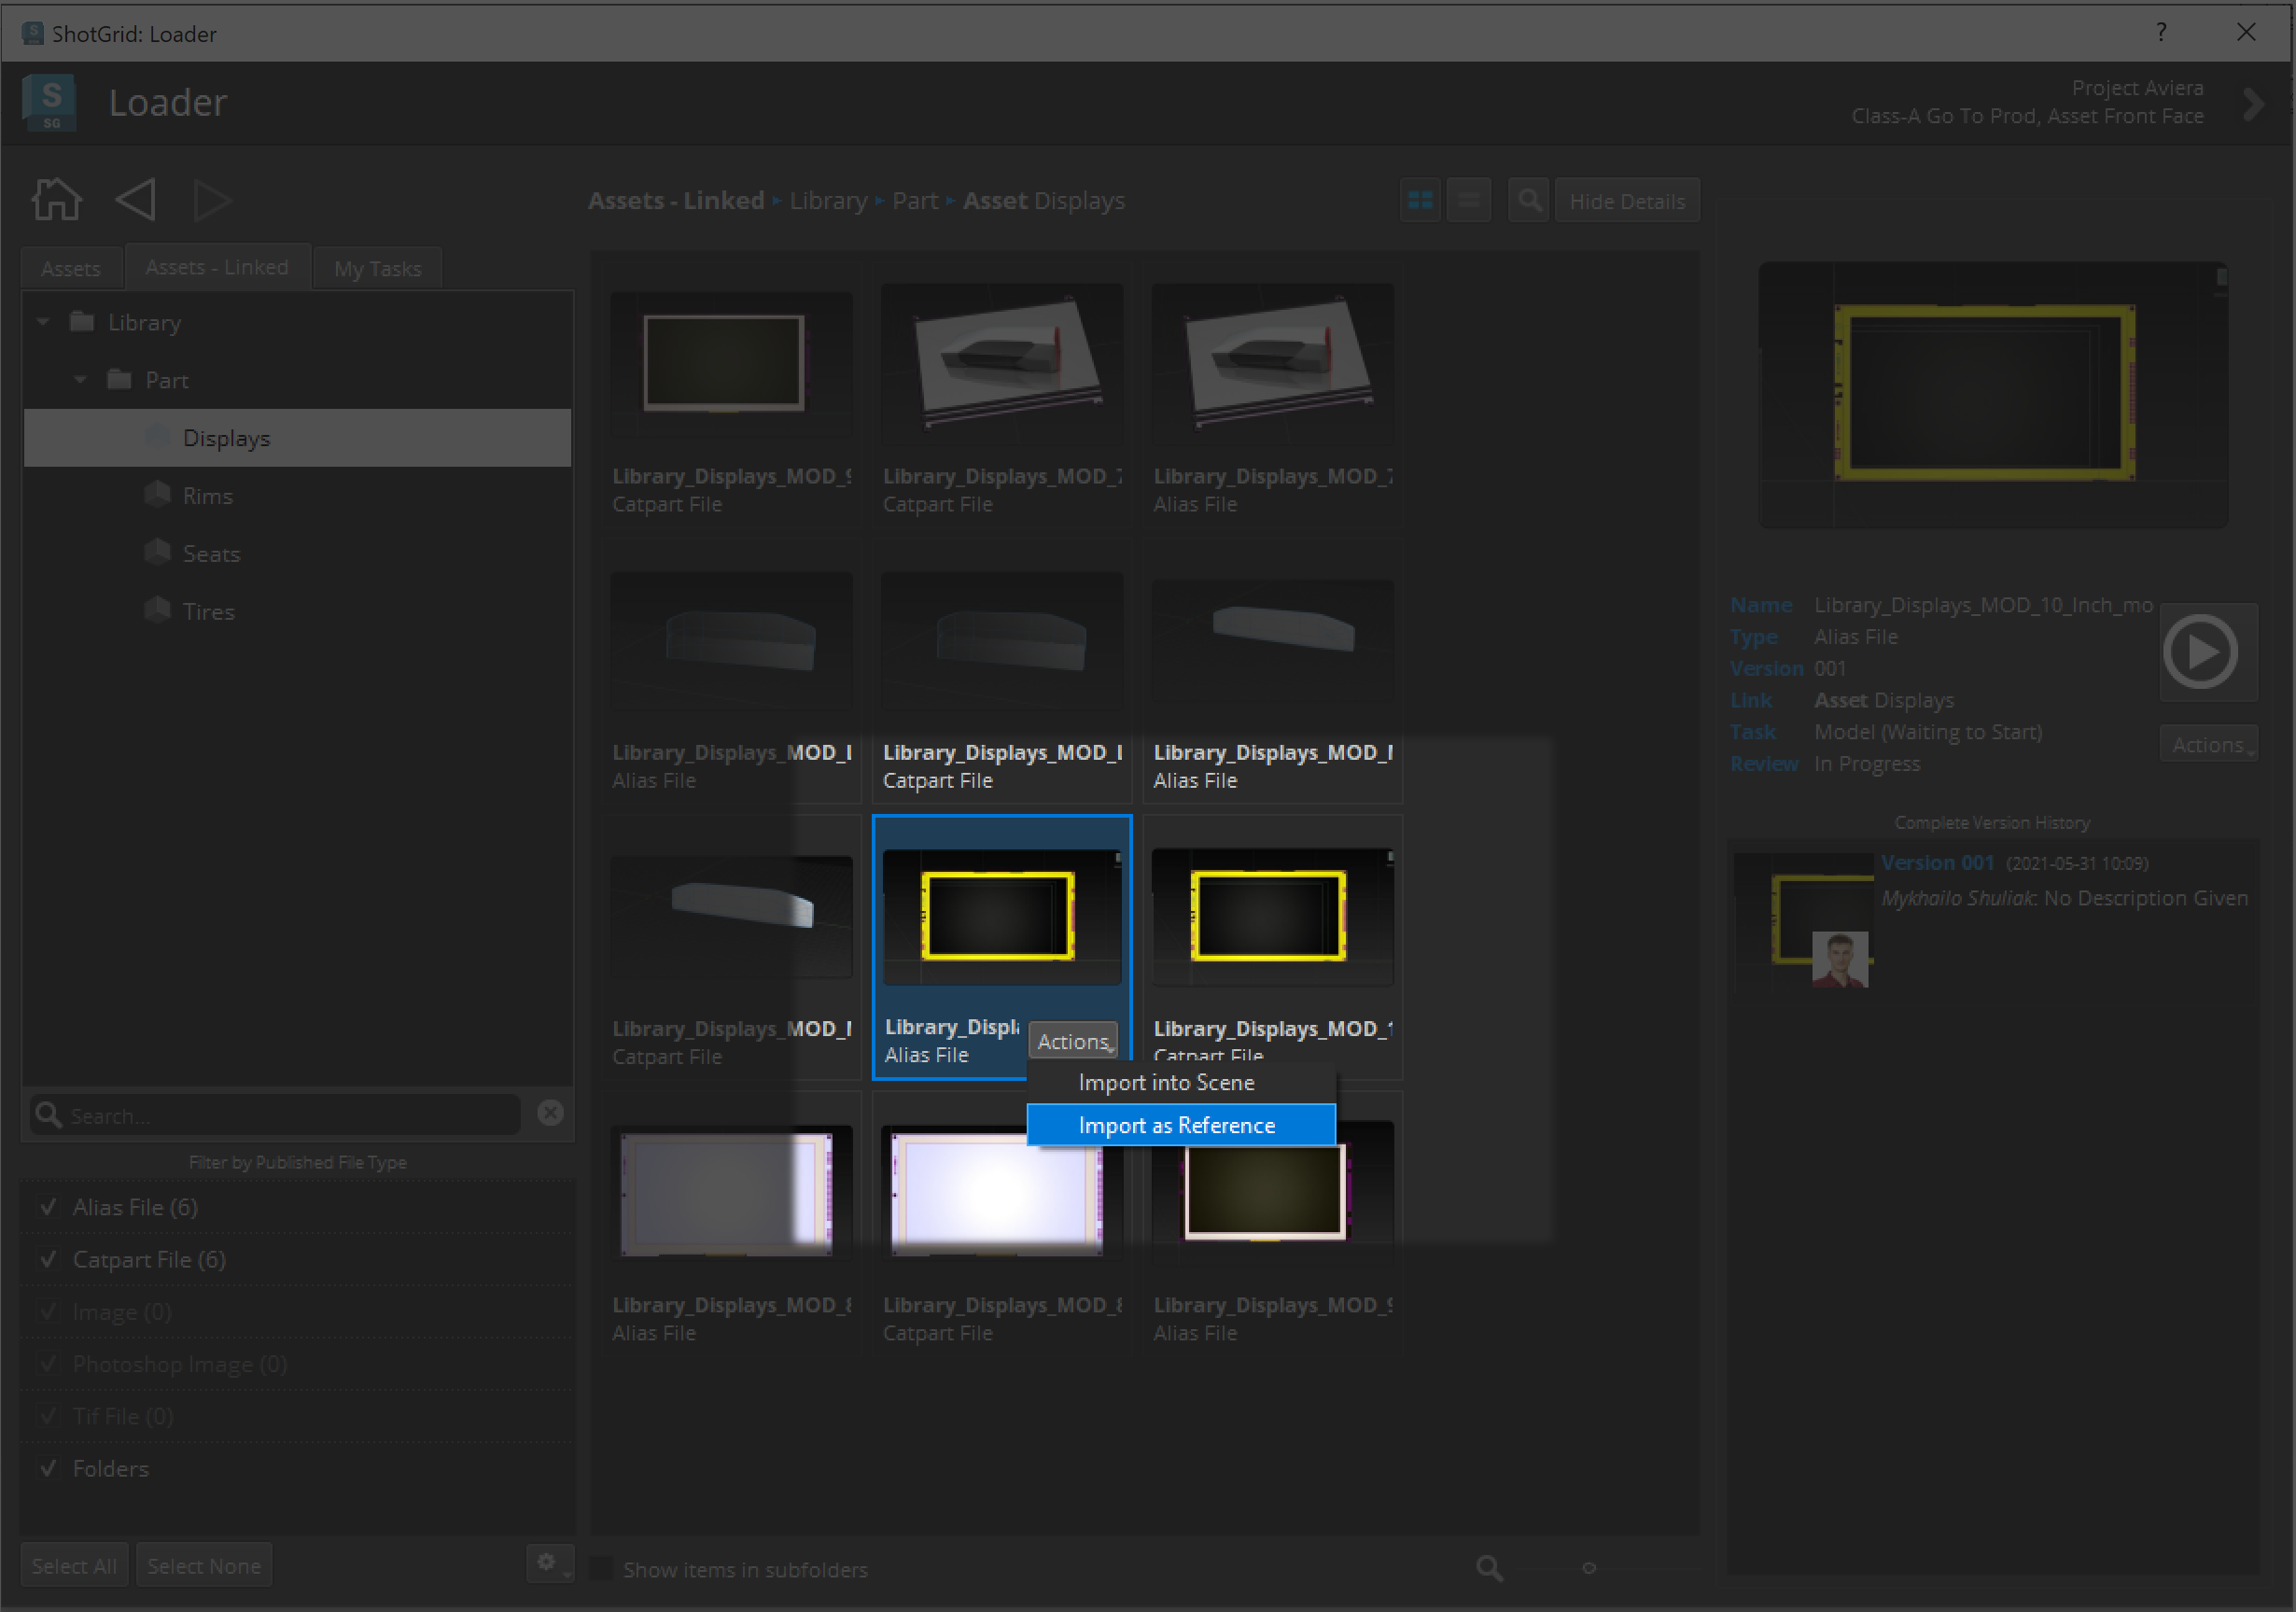
From here, you can take advantage of your content creation software Loader actions to do things like Import—if you plan to duplicate or fork your asset breaking any connections to its source—or Reference the Asset for an ongoing connection to the current Version and all subsequent Versions of this Asset.
Step 3 - Updating those assets
If you choose to reference the Asset by keeping the connection to the source, you will likely want to see updates and changes to that source Asset. In this scenario, it’s common that another team may continue to iterate on the source Asset and you will need the latest Version.
Using the Scene Breakdown 2 App in your config will enable you to see all the referenced items currently in your Scene. When any of these references get updated, the Scene Breakdown will show you the conflicts, share the Published File notes about what changed, and allow you to update to the latest Version or any other Version of the Published File.
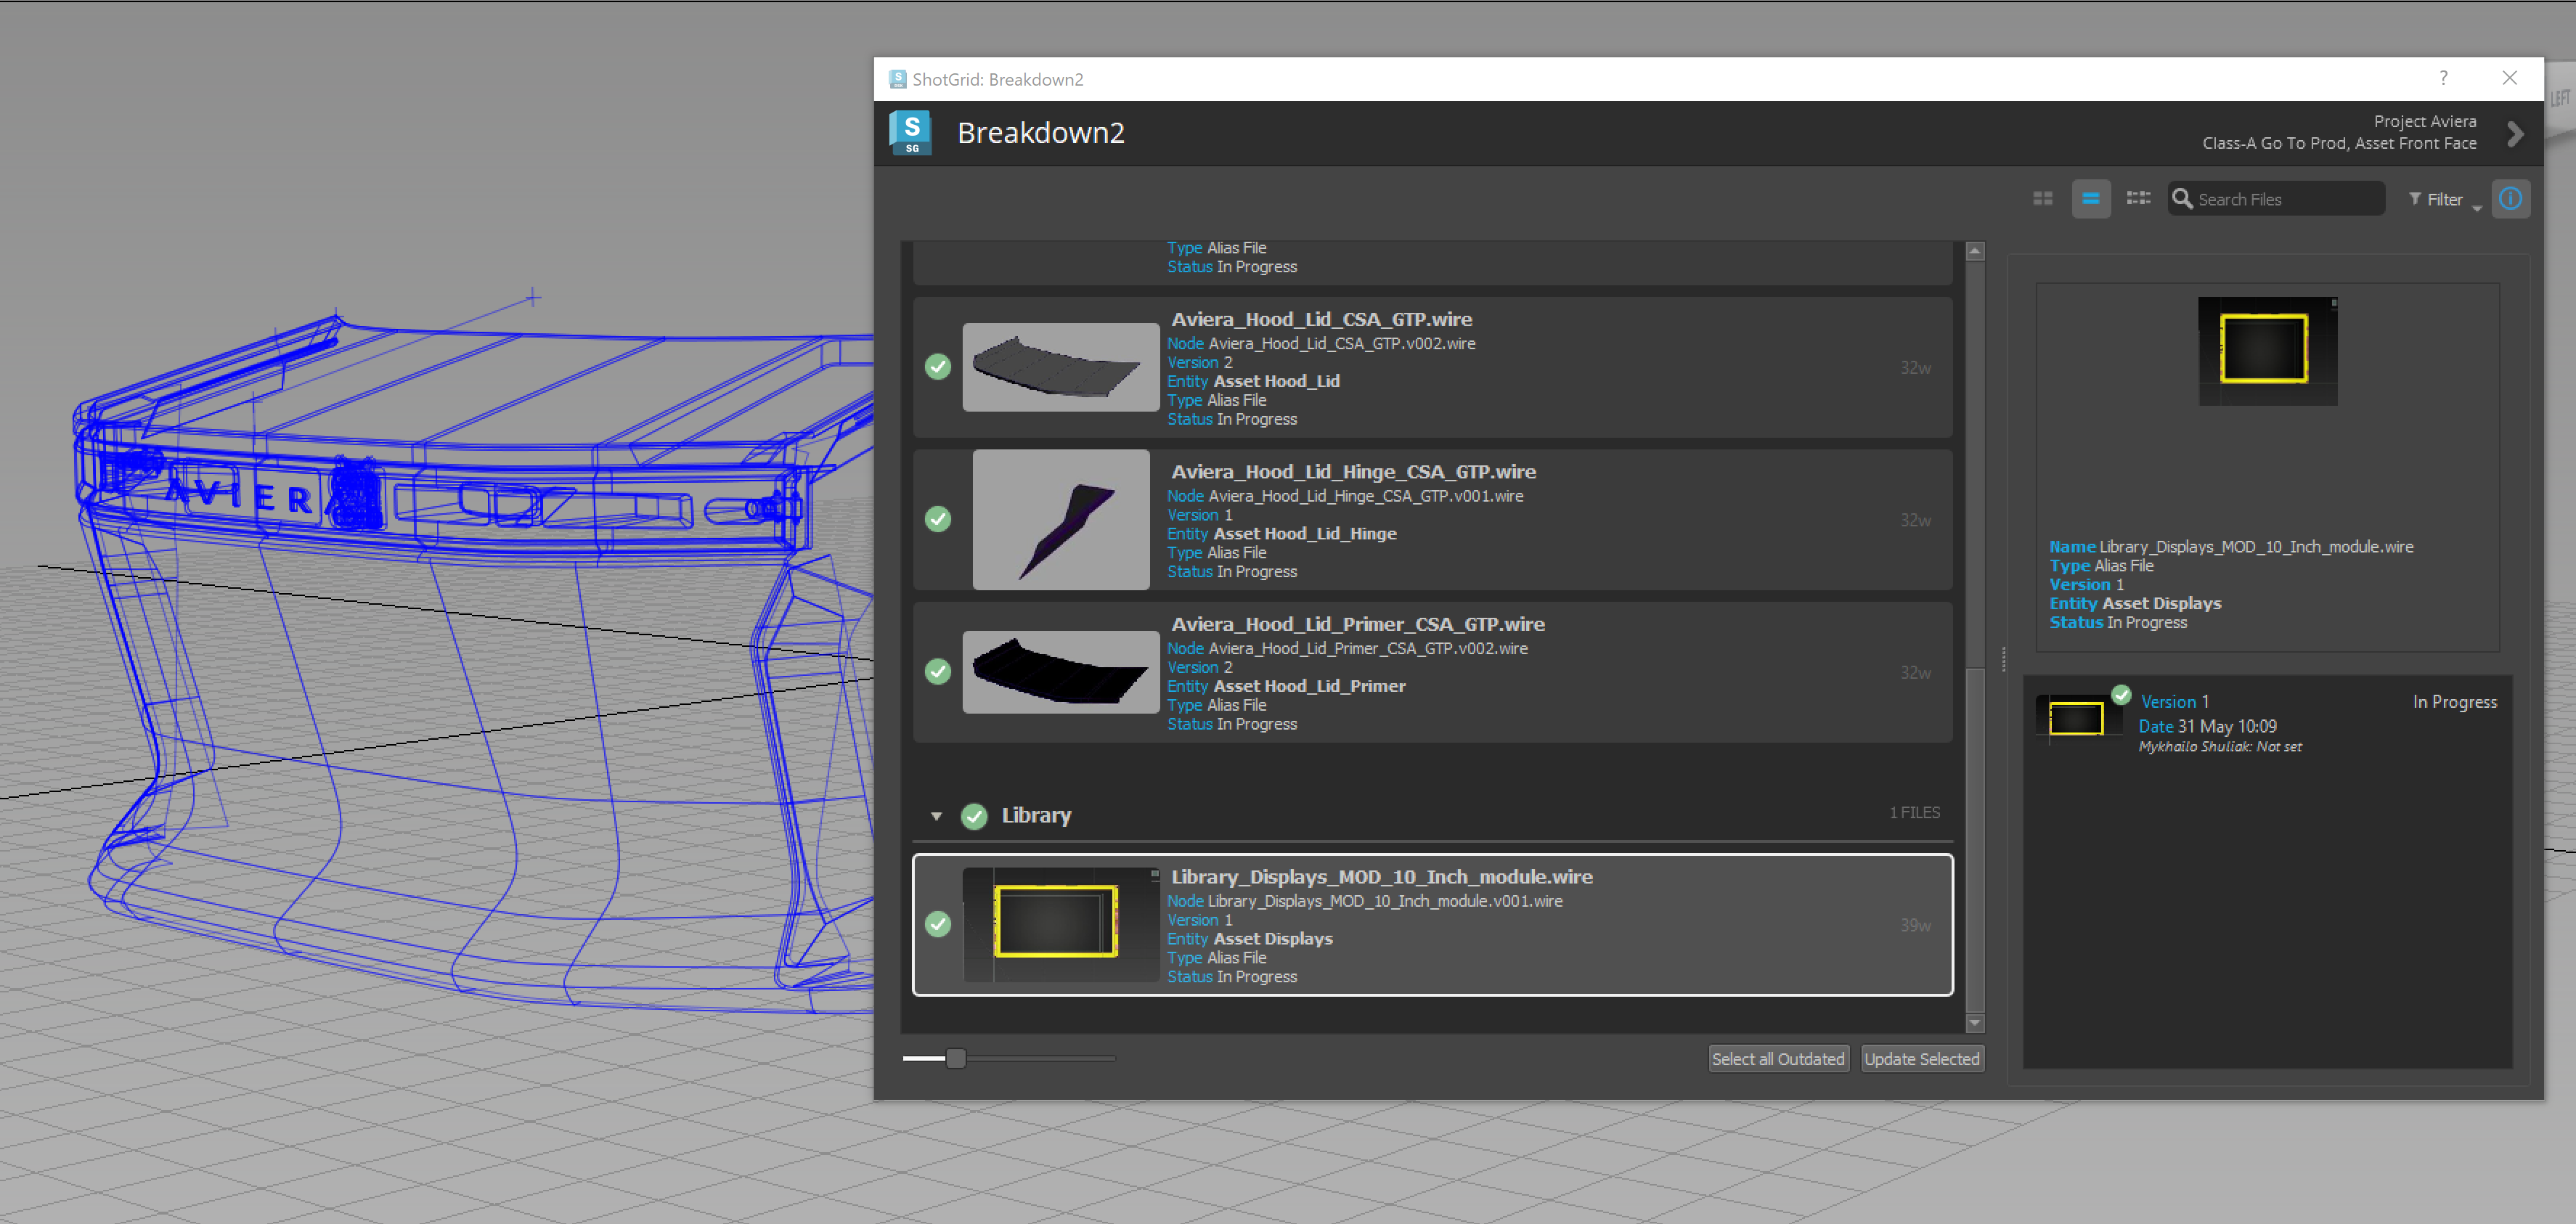
Note: The updating of Assets only applies when using an Advanced Configuration. If your studio uses a Basic Configuration, you will not have access to this Scene Breakdown App.